white's kitchen

A diary of our food adventures, dining experiences, and homemade creations


Leave a comment

Crafty Hawaii

We’ve been home from Hawaii for three weeks but I haven’t quite finished all the posts about our foodie adventures. Since we’ve been home, I’ve had some work dramas, Pete and I have both been sick, Braithan’s been teething, my sister was here for a week… the days just disappear! Hence this post has been sitting in draft for 10 days waiting to have photos added and hit the go button… at long last I’m doing it!

Anyway, if you were following our White’s Kitchen Facebook page while we were away, I bet some of you will have been thinking “where are the beer posts? There’s no way they went to Hawaii without going to at least one local brewery”… and you’d be right! In fact, we went to five! Which, as it turns out, results in far too much information for a little Facebook post; this portion of the trip is worthy of its very own full blog. So, pro tip: Pour a beer before you read, this is a novel!

Pete did a lot of research into this matter before we went! But we couldn’t go to all of the breweries he looked into, for a few reasons… some were too hard to get to, some wouldn’t allow minors on site so we couldn’t take Braithan, and some we just didn’t have time for. However, he’s let the team down a little when it came to this blog… he did most of the drinking, but not much remembering, so apologies that some of the finer details are a little vague!!

Our first brewery was while in Maui, when we went to the Kihei site of Maui Brewing Co for lunch one day. It looks like a nearly brand new facility, and it’s HUGE! We were sitting inside the restaurant, but there was a gorgeous big deck out the front which looked like the perfect place for a session with a view, as long as it wasn’t too hot a day.

Except… you would NEVER be able to have a session here! Or, if you did, it would be slow and tedious!! Yes folks, there’s a rant coming… let me get it over with now and then I can get on with talking about the good stuff.

There is a STUPID rule/law/guideline over there, and we were never quite able to figure out if it was just Maui or all of Hawaii, nor could we establish what the “law” was, as everyone had a different interpretation of it. But what it meant at Maui Brewing Co, the first place we encountered it, was that you couldn’t order a flight/tasting rack… but you could order “sample sizes” for $2 a pop… but you couldn’t order more than one at a time. Yes, that’s right, you can taste all of their beers one tiny thimble at a time (an exaggeration, but they were very small), but heaven forbid you have two thimbles in front of you. So dumb!! I must mention that when we moved into the tasting room after lunch, Pete was allowed two thimbles at a time… but still! And also, their website menu mentions that you can do flights so they really need to update that. Who ever heard of a brewery where you can’t do flights?! Madness…

(I actually can’t remember/didn’t notice the actual menu at the restaurant and whether that did or didn’t include mention of the flights, but that’s hardly the point… in this day and age, your website needs to accurately represent your offering, and it doesn’t)

Anyway, the reason we can’t figure out the actual law is because of the inconsistency. At Maui Brewing Co, they only seemed to allow one drink per person. At some other places, you were allowed one additional drink to your party (i.e. 2 people could have 3 beers, 4 people could have 5 beers etc). And yet, in some restaurants, your “one beer” could be a 22 oz beer if you so wished (that’s 650 ml!), and in some breweries we were allowed to do flights of between 4 – 6 beers. So it’s just mental and quite frankly, it really pissed me off! It seems they are trying to solve a drinking culture problem which doesn’t actually exist, and furthermore it’s obviously an incredibly loose law, if it even is one, because everywhere we went had a different interpretation of it.

Anyway, rant aside, back to the Maui Brewing Co…

The food was pretty good. Pete and I shared Ahi poke tacos, pork belly bao buns, and a jalapeno bacon burger. It’s going back a while now, but I remember it all being really yum. The burger in particular was juicy, tasty, and far exceeded my expectations. My sister had the fish tacos, and although they didn’t hit the heights of the ones she’d had elsewhere a couple of days earlier (which were apparently up there with the best in her life!), she was still pretty happy with them.

img_7167

Top to bottom: the Ahi poke tacos, jalapeno bacon burger, and pork belly bao buns

img_7169

The Ahi poke tacos

Beer-wise, by the time we’d had lunch and then spent some time in the tasting room, Pete actually did manage to try nearly all of the beers. Working within the confines of the “law” mentioned above, that was no mean feat!

His assessment was that they were all generally pretty good. Although this was the first brewery we had been to, we’d been in Hawaii for nearly a week at that point and he’d been trying local beers everywhere we went, and at that stage of the trip he thought that the beers at Maui Brewing Co were the best local beers he’d tried. Later in the trip he had better, but he still rates the Maui selection as “up there”, and he liked them enough to buy a growler of one of the IPAs while we were there, so that says something! I would definitely say that Maui Brewing Co is the most commercial of all the local brews we tried though; their selection is readily available in most places, so I guess it’s along the lines of Tuatara or Moa at home… true “craft” beer once upon a time, but a little less so these days.

Tasting “thimbles” in the Maui Brewing Co tap room

Next up, a few days later and back in Honolulu, we went to the Yard House. The Yard House is “famous” for having a ridiculous amount of beers on tap. Their website seems to be permanently broken so I can’t check, but it’s over 100 I think. We were a little disappointed to discover it is actually a chain… somehow that takes away some of the magic! It was always on our “to do” list, though, as Pete went there when he was last in Hawaii about 11 years ago and had a very memorable night there, so wanted to take me back, and I’m glad he did.

We got a bit of a surly reception due to wanting to keep our pushchair with us (your choice… do you want our baby to sleep, or scream? LOL). They also asked how old the baby was (nearly four months) and then gave us a kids menu, haha! But once over those hurdles, it was great. Pete got to try quite a few beers, courtesy of two “build your own” flights, and I discovered the most delicious cider ever which makes me sad just thinking about it because I miss it and want another one! Paradise Ciders Lei’d Back Lilikoi, where have you been all my life?!

img_7399

“Build your own” flights at the Yard House

“Build your own” flights at the Yard House

Also, special mention to the Hawaii Nui Brewing Hapa Brown (American Brown) and Anderson Valley Brewing Company Wild Turkey Bourbon Stout. The first one was just yum, so worth a mention, and the second one tasted totally like you’d put bourbon in your beer. Which may or may not be a good thing, but hey, it does what it says on the tin!

If you have a few hours to kill, and adventurous taste buds, I’d highly recommend a visit. I think it would be especially fun if you could get a seat up at the bar, but that wasn’t an option for us because of the baby. I was also really impressed with the knowledge of our waitress. With such an extensive menu, I didn’t expect much, but she knew lots about lots – top marks!

“Build your own” flights at the Yard House

Fast forward to our last day in Honolulu… brewery day! We had a plan of four places we wanted to go, and they were all within about 500 metres of each other, a 2 km walk from our accommodation. On the surface, a great plan, but the varying opening times and a need to be back for a dinner date with my sister’s family by 7 pm made it a bit of a logistical challenge. Because places like that open at “normal” times in NZ, it just never occurred to me that a brewery might not open until 4 pm or later! And yet, some opened at 11 am, so with some careful planning and monitoring of the schedule (I’m not even joking, I wrote a run sheet and was the time keeper on the day), we did it!

First up, Waikiki Brewing Company, Kakaako. Another place which needs to review their website, as we purposely went to this location rather than their other site right in Waikiki, as the menu looked better at this one, but when we got there it was the same as the Waikiki menu. Or, at the very least, the things we’d seen online that we wanted to order were no longer on the menu. That was a short-lived disappointment, though, as the beers and food were delicious, and the service was top notch.

A feature of their menu is craft beer cocktails, which sounded intriguing. However, one was gin based (yuck!) and one was Bloody Mary-esque (double yuck!) which left me with only one option, the Hana Hou Shandy, which was muddled fresh orange and strawberry with simple syrup, fresh squeezed lemon juice, topped off with one of their house brews, the Hana Hou Hefeweizen, and a splash of lemon lime soda. That’s lots of words to describe something which can be summed up in one… yum! Or maybe two: fresh, and delicious. I really, really enjoyed this, and will definitely be keen to try and recreate something similar in the summer.

My yummy Hana Hou Shandy, a craft beer cocktail

As a starter, we got a warm pretzel. Following a great warm pretzel experience in Taupo last year, that’s become a “thing” we have to order when we see it. This one was presented in a really impressive way, hanging off a hook! It was served with three different mustards, which were all delicious: Jalapeno Mouth Beer Cheese, 808 Carolina Gold BBQ Sauce, ​and Honey Mustard (with Jalapeno Mouth and 808 referring to two of their house brews). I’d say the Carolina Gold was my favourite, but they were all pretty awesome; it was hard to choose a winner.

Warm pretzel and mustard deliciousness!

For mains, Pete had the Drunkwurst Sandwich and I had nachos. Both were really generous serves, and both pretty tasty. An excellent way to line our stomachs before embarking on our mini pub crawl!

My nachos were wonderfully plated – the toppings were all layered between the chips rather than just being dumped on top

img_7534

Pete’s “Drunkwurst” sandwich with a side of black beans

In terms of the beers, Pete can’t remember many details but recalls there were a couple which were quite bland, and a couple which were a bit sweet for his taste, but the IPAs – his style of choice – were well balanced and pretty good. We also need to give a special mention to their Jalapeno Mouth Amber Ale, which was really interesting. Although the jalapeno flavour was quite pronounced, there wasn’t really any heat to it, meaning it was really quite drinkable. Probably one of my favourite chilli beers I’ve tried.

This place was pretty child friendly, with blocks and things to play with. In our case, it worked against us as we needed the baby to sleep, so had to move to another table, but if you had older children with you, they’d be well entertained while you worked your way through a couple of flights.

Not for us, though… no time to dawdle, the schedule demanded we move swiftly to the next stop, Honolulu Beerworks!

This was my favourite brewery that we visited, I think. They have sooooooo many more beers than they promote on their website, and they’re all so interesting. Based on their website, I was fairly ho-hum about going there – and actually, as I was wrangling the schedule trying to make it work, there were so many times that I nearly said to Pete “why don’t we just skip the Honolulu Beerworks?”

I’m very glad I didn’t! I hadn’t actually been planning to drink at this stop at all… but there were so many things which made me think “ooh, that’s different, I have to try that!”, that I decided I just “had” to feed Braithan a little earlier than planned so that I could then sample a few brews! Although they don’t have much on their website, in reality it’s a really extensive menu, but this is the place that allows you to do flights of six beers, so between between my flight and Pete’s two, we got through everything we wanted to try. They had a great little system, too, where you got a pad and pencil to write your flight down on… made it much easier to plan out how we were going to do it.

img_7540

img_7541.jpg

Pete thinks the Makakilo Brown Ale deserves a special mention, but outside of that the main thing to mention from this stop is the sour beers…. and the extent to which I enjoyed the sours was certainly the surprise of the day for me! I’m not usually a sour beer fan at all, but the combinations sounded intriguing enough that I was willing – in fact, enthusiastic – to throw caution to the wind and give it a crack. And in most cases, it really paid off. Just as the property “rule” is location, location, location, I strongly feel the beer rule is balance, balance, balance. I don’t usually like really hoppy beers, but if you give me a well balanced beer then I actually don’t mind big hops. I think that’s the same with the sours… I don’t usually enjoy them, but the ones at Honolulu Beerworks were so well balanced, that I really like them. Probably not enough to order a whole pint! But enough to thoroughly enjoy my tasting size.

A standout was the “Sour Jessica Pucker” which, from memory, was a cherry sour. I also tried the Meyer Lemon Sour, being a sucker for anything lemon! It was nice (if super sour and lemony is your thing!), but from memory a bit too intense for me and I struggled to finish the sample size, passing it over to Pete in the end.

We both agree that this was probably the overall best place we went to, in terms of being the most interesting and exciting with the flavours and combinations they had on offer. Definitely not for “beginners”, but if you like to be challenged and you’re comfortable with not loving every beer you buy, then this is a great place for an adventurous afternoon.

The flight racks at Honolulu Beerworks were made from old barrel boards – very cool, and looked pretty on the table with their curve

No time to dilly-dally though – it was now after 4pm so we were able to move along to the next stop, Aloha Beer Company.

Pete thought that this place was the most like a NZ pub/brewery. I’m not sure about that, but it was a pretty cool space, and a remarkably cosy and enjoyable space for what was actually quite a dingy concrete-block room! One NZ-like feature, though, was that you ordered at the bar, rather than table service. Hallelujah! I’m not saying the typical Kiwi “order at the bar” system is flawless, but if you’re going to insist on table service only, then I really must insist on much quicker and more attentive service than we got in most places. It drove me mental! So it was nice to be allowed to just walk up to the bar and order when we were ready.

img_7551

Yet another place where I wasn’t planning to drink, but then they had my “new favourite” cider from the Yard House, the Paradise Ciders Lei’d Back Lilikoi, so I “HAD” to!

By this stage of the day, as you may be able to tell by the photo above, we were several flights in and a little on the cosy side! I was very mindful that I was at my limit if I was going to be safe to feed my child again in a couple of hours, and Pete was about four flights in! As such, we have no details to share about the actual beers consumed at this stop, haha! However, Pete did say that he thinks this was a very close second after Honolulu Beerworks, and it was definitely the most consistent brewery in terms of him liking everything he tried; there was no “dud” in the rack.

Neat view of the brewing operation en route to the toilets at Aloha Beer Company

All we ate here was steak fries, but people at the table next to us had the sausage and pretzel plate, which looked great and seemed a popular choice around the bar – grilled Andouille and bratwurst sausages served with a duo of house mustards and a warm Bavarian pretzel (loving this warm pretzel trend!). They also have lots of sharing platters on the menu which is our idea of perfect pub grub… shame we didn’t get to try any.

The walls of Aloha Beer Company were adorned with very cool patent drawings of beer related “stuff”, such as this one of a can rip-tab design

The last flying stop on our way back to our dinner date was to pop into Home of the Brave Brewing Company & The Brewseum. We kind of had an inkling that this stop might be a little disappointing and not quite as cool as we wanted it to be, and sadly we were right. One thing I should clarify, though, is that we thought the brewery and brewseum were one in the same – i.e. we thought it was a brewery that, in it’s tap room, had a museum-type display of brewing and war time memorabilia. This wasn’t quite correct… although there is loads of stuff on display in the pub, the full brewseum is actually in a separate building next door, and it wasn’t open when we were there. So, overall, it was kind of underwhelming and wasn’t what I was expecting.

They only had one house brew on tap… Pete can’t remember which one it was; he remembers that is wasn’t a bad beer, but it was the least interesting of all the beers we tasted that day. They did have lots of other local beers on the menu as well, so if you hadn’t tried many local drops it would probably be a cool place to try them, but Pete had already tried them all and we didn’t have time to hang around anyway.

In terms of entertainment value, the highlight was that the juice I ordered came in the sachet/juice box style that would be more at home in a school lunchbox, complete with a straw in a plastic sleeve on the side!!

Did someone say a beer and a juice box please? Hehe! The free popcorn was nice though. A few places had popcorn machines in the corner… must be the “thing” in Hawaii.

If you had some time to kill as you wandered home from the other breweries in this area, then by all means stop in. And probably even more so if you’re able to go on a day/time when the Brewseum part is open, as I’m sure that’s quite cool. However, if you’re short on time like we were, then you’re not missing much.img_7557

So that’s it. That’s how to sample as much local craft beer in Hawaii as you can, even with limited time and a four month old in tow!

One thing worth mentioning that I don’t seem to have talked about so far is the Hawaiian dark beers. They were generally pretty tasty, but so light terms of body/mouth feel for dark beers… but that’s exactly what you want when you’re in the heat. Something I found myself saying repeatedly, about many different darks, was “I feel like if I had this at home I’d be saying it doesn’t have enough guts, but for some reason this really works”. What I think it was, was that at home I tend to have dark beers more in the winter and so like them to be heavy, “meaty” and bold, but that’s not at all what you want in the heat, and that’s what I think they do so well over there… produce a tasty dark beer that can be enjoyed in 30 degree heat without feeling too heavy.  What is interesting, though, is that we brought home a few drinks that we hadn’t got through when we were there, and there was a dark beer amongst them. When we drank it at home, on a cold, dark, wintery Waikato night, it was fairly underwhelming. This left me questioning… was it really not a great beer, and definitely nowhere near as good as the others that we tried while on holiday, or was it just that it didn’t stand up in wintery conditions? Would some of the other “great” light dark beers we enjoyed on our trip have been really disappointing at home as well? Would the one we drunk at home have tasted much better in the Hawaiian heat? I guess we’ll never know…


Summary of places visited, for those wanting quick links (these are all Facebook links as in many cases I found there was better/easier to find info on Facebook, but most Facebook pages should also have links to their main website):


Leave a comment

Magical basil pesto

Why have I called this post “magical” basil pesto? No real reason, except that I freaking love pesto!! And so to me, any time you get to add it to a dish, that dish instantly becomes magical!

At the beginning of the year, I was determined to post more regularly, aiming for once a week. But, after week one, I failed… I made and photographed the potato salad recipe I “invented” over summer and was all set to post it for week two, until I realised that I left out a key ingredient – pesto! So I wanted to make it again and photograph it WITH the pesto included… but in the meantime had finished the last of our pesto and it’s taken me this long to get around to making more. And no way was I BUYING pesto when I had so much basil in the garden!

I stuck my hand out for comparison… there was a LOT of basil which went into my batch last night!!

While I DID make the potato salad last night and will post that next week, I thought it made sense to start at the beginning and first post about making pesto, especially as I recently had someone ask me how to make it… that made me realise that people may not understand just how easy it is to make your own. Not to mention how much value you get! I personally think pesto is a summer essential to have in the fridge, but it’s not cheap! However, I predict that for the cost of about one shop-bought tub (I’m talking the tubs which are approx. 1 1/2 cups in size), I made about four times that much last night.

The jar on the back left is a salsa/guacamole size jar… so I got that, a jumbo size jam jar, and then a small jam jar for Dad who only wants a little bit. A fairly good haul, for a fraction of the price of store-bought!

Now, don’t get me wrong… if you haven’t grown your own basil, it isn’t worth it… having to buy the basil makes it uneconomical, as you need so much to make a batch. But if, like me, you have it growing in abundance in your garden and find yourself wondering how you’re ever going to use it all, then DIY pesto is a great way to go.

This is going to be one of those annoying posts where there are no quantities listed… it’s all done on gut feel and personal taste. And remember, there are no “rules”. I’m sure there are some Italians somewhere who would read this and be horrified by my take on pesto, but this is what I do, and I think it’s delicious. Note that these instructions assume you have a good food processor or at least a bullet mixer of some sort to make this an easy job… I’ve never attempted it “by hand” and imagine it would be tricky to get the right consistency, not to mention a tedious process!

Basically, just blitz together the following…

Basil – It’s always a good idea, I think, to blitz the basil first… that gives you an idea of your quantity before you prep any other ingredients. You’ll be amazed how much – or rather how little – a tonne of basil blitzes down to. When I’m making a large volume, I do this, then take it out of the food processor while I chop the nuts, before adding the basil back in. This is just so it doesn’t get too mooshed up.

Nuts – Anything goes here. “Traditionally” (perhaps “typically” is a better word… I have no idea about the authentic, traditional ingredients) you’d use pine nuts and in an ideal world I LOVE to use pine nuts in my pesto… but they are soooooo expensive! So I tend to use cashews or walnuts instead. Use what you prefer. Pine nuts definitely make it taste next level, but I can just never justify the cost. And just remember that if you use salted nuts, you won’t need to add as much salt at the end. As I mentioned above, I take the basil out, blitz up the nuts, and then add the basil back in. This allows you to chop the nuts as finely as you like without over blitzing the basil. I’d say for my big batch last night, I put about a cup or so in initially, but ended up adding in the whole amount I’d bought, so probably about two cups (unchopped measurement) or just over, in total.

Parmesan – While the quantity you use is down to personal preference, I think the Parmesan component is really important to the balance of the whole thing, so be prepared to use a lot more than you think you will. In the large batch I made last night, I used the better part of a 200g block. I grated it finely by hand, then added this to the food processor and pulsed it a couple of times to mix it through. Initially I probably only did about 100g but later on, when tasting it, I decided it needed more and added another 50g or so.

Nearly there… have just pulsed through the Parmesan

Garlic – Be careful! I love garlic but have a tendency to “over-garlic” things in my excitement! And there’s nothing worse than putting too much garlic in, as you can’t get it back and you’ll end up spending ages (not to mention a lot more oil and cheese and who knows what else) trying to balance it once you’ve overdone it. I think last night I used 5 or 6 cloves and that was JUST acceptable… I should have done 3 or 4 and then added more later if I needed to, but in this case I managed to get away with it. I always crush the garlic before adding it to the mixture and pulsing… my view is that, by this stage, the volume of ingredients in the food processor is too great to adequately chop the garlic and you don’t want big chunks, so it’s better to add it crushed already, rather than sliced or whole.

Oil – This is another one where you’ll be surprised how much you use. Having said that, it’s really up to you how stiff or loose you want your final pesto to be… obviously the more oil you add, the looser it will be. And again, use whichever oil you prefer and whichever suits your budget best. Ideally I like to use olive oil, but I also use rice bran sometimes, or a combination. I think using at least SOME olive oil makes a big difference to flavour though. Last night, I used predominantly olive oil, but then topped it up with rice bran oil at the end as I was working on the consistency. I would pulse in your oil and get the consistency mostly where you want it before seasoning, as the amount of oil you do/don’t use will affect how much seasoning you need to add. Also remember that the olive oil (possibly all oils? Not sure…) will firm up in the fridge when you’re storing it – so if you add more oil to make a looser pesto you’ll need to get it out a wee while before you want to use it so the oil has time to warm up and liquefy again.

Salt, and other adjustments – Once you have the consistency sorted, the tasting round begins. Taste it, and add a little salt if required. Pulse again, and taste again. Does it need more texture? Add more nuts, pulse again, taste again. Does it need more depth and creaminess? Add a little more cheese, pulse again, taste again. How’s the garlic level? If it needs more, add a LITTLE more*, pulse again, taste again. A little too garlicky, or a little too stiff? Add more oil, a little at a time, then pulse again, taste again. After your adjustments, how’s the seasoning? Does it need more salt? Add a little more, cautiously. Pulse again, taste again… and so on. The initial process is generally quick, but I often spend almost the same amount of time tasting and adjusting as I do banging the first lot of ingredients together. It’s tempting to go “oh, near enough” but trust me… it’s worth persevering until you’re totally happy.

And that’s it! Pop it in some jars, and store it in the fridge. How long will it last? I don’t know. Ages. Longer than it will take you to eat it, if you go through it like we do! I love just tossing it through hot potatoes for a little something special, or using it as the “dressing” for a roast vege salad (add it while they’re warm for best results). Add a bit more oil to loosen it and serve it as a dip, or have it on toast with marmite (trust me!), or eggs. Actually, stirring a bit through scrambled eggs is pretty good too. And, of course, it’s the magic ingredient in my new family favourite potato salad which I will share next week.

Nothing says summer like freshly made pesto, so have a go… you won’t regret it!

Working on the consistency

* If it needs less garlic… good luck! Basically continue the taste and adjust process but it will just take longer, and more stuff. Depending how much I’ve buggered it up, I sometimes start looking around my kitchen for other things I could add to “fix” it… but it’s really trial and error, and it’ll probably still taste a little too garlicky no matter what you do, even if you manage to tone it down. Live and learn! 


Leave a comment

Lemon meringue pie (aka the best dessert ever)

This is a story about perseverance. A battle of wills between me and a simple sweet treat, and my eventual triumph!

One of my tasks for our Christmas meal was desserts. The week before, my brother-in-law mentioned how much he loves lemon meringue pie. Me too! I hadn’t decided what I was making for Christmas yet, so I added this to the list. I was so excited!! The rest of the plan was pretty simple too… Eton mess, and gluten free brownie.

I pretty much failed all round! We were at the beach and I didn’t have a brownie tin, so made the brownie in a cake tin. Probably not the end of the world, except for some stupid reason I didn’t line the tin so although it tasted okay (actually, to be honest… was probably a bit undercooked in the middle!) it all stuck to the tin and was impossible to cut nicely. So, I ended up just mixing the brownie bits into the Eton mess, and that was all we had for dessert. Yep, of the three planned dishes, I only successfully achieved one. One and a half at best! I was not a happy camper!!

So what happened to the lemon meringue pie? Let me tell you a tale…

I made the lemon curd the day before. I have an amazing lemon curd recipe, and yet for some reason I decided not to make that. No, I thought it would be best to make the one recommended in the recipe I was following. It was sooooo bitter! So that was my first challenge, trying to balance the bitterness. Can’t actually remember now what I did, but I got it to a reasonable state in the end. But I could also tell from the get-go that it was going to be way too thin. I was definitely concerned about “sloppy pie” but thickened it as much as I could and just hoped the rest would happen like magic as it cooled.

Fast forward to Christmas Day. I went to roll out my block of ready-made pastry. Realised I didn’t have a rolling pin at the beach. Cue the husband who assisted by finding a round whiskey bottle I could use! It was stinking hot, so when I put the pastry into the (loose-bottomed) tin, it pretty much fell to bits and became the biggest patchwork job ever! The good thing was that because the pastry was so warm, it was really easy to blend the edges and join all the bits!

So far, not smooth sailing, but I soldiered on. Put it in the oven to blind bake – lined with baking paper and rice.

The timer went. I grabbed the tin so I could remove the rice and finish baking it. Remember how I made a point to mention it was a loose-bottomed tin? Yeah, I forgot that on the day. Put my hand right underneath it and managed to push the bottom up, thus spilling rice all over the kitchen floor and ruining the base. At that point hubby came into kitchen looking for a dish for the meat he was cooking. I may have yelled at him to go away. There may have been swearing. I can neither confirm nor deny.

Amazingly, I still didn’t give up. The base wasn’t too ruined… I managed to push it mostly back into shape in the tin and it was still soft enough to not have bad cracks etc, so I thought we were back on track. Put it in to finish baking while I swept up the rice.

Managed to get the baked base out of the oven without further incident. Let it cool down before adding the lemon curd (I wanted to do this before I made the meringue so the curd had time to “set” in the base if the curd was a bit runny). Remember how I said I suspected the curd was too thin? Yeah, it totally was. As I poured it in, I was feeling decidedly average about this dessert, given how it had gone so far. Still, I was trying to look on the bright side. So it’ll be a bit runny. Who cares? I’m sure it will still taste okay. Into the fridge, and time to make the meringue.

Except… I couldn’t find my egg whites. I’d purposely saved them the day before when I made the curd, and knew what container they were in an everything. I looked everywhere. I asked everyone. I looked everywhere again. The egg whites were nowhere to be seen. At which point… I was defeated! THERE WILL BE NO LEMON MERINGUE PIE TONIGHT!!! I was just sooooooooooo grumpy and over it by this point. I should also add that somewhere in the middle of all this was when I realised I’d also screwed up the brownie, so I really wasn’t feeling fantastic about my abilities at this stage!

So, that was Christmas!

(By the way, I found the egg whites a couple of days later, exactly where I thought they were the whole time, but just hidden behind some ham which I obviously didn’t move when looking for them!)

Not one to shy away from a challenge, and determined that a simple stupid lemon meringue pie would not get the better of me, I planned take two for New Years Eve.

This time, I used my tried and true lemon curd recipe… success! I bought the sheets of pastry instead of stuff that needing rolling out, so it was quicker and easier to work with… success! I was extra careful with the base, and put it on another tray just to be extra safe… success! I kept track of my egg whites too, LOL!

And was it amazing? Hell yeah it was! And because I had half the pack of pastry left, I made another one to take to a friends’ house for dinner a few days later, and that one was also a success (okay, so I actually forgot to spray the tin so it stuck to the bottom a little! But it was MOSTLY a success!!)

I just can’t quite decide the best way to serve it… On New Years Eve, I served it warm out of the oven. Which was delicious, but the lemon curd was a bit runny/oozy due to being warm. When I took it to my friends’ house, we had it cold. So it held its shape better, but the meringue had all kind of pulled away from the sides as it cooled, so it didn’t quite look as good. So if anyone has any advice on that side of things, I’d love to hear it, but for now, here is the now infamous lemon meringue pie recipe! May your kitchen adventures be less stressful and eventful than mine! 😉

Lemon Meringue Pie

For filling/curd:

  • 3 oz. (6 Tbs.) unsalted butter, softened at room temperature
  • 1 cup sugar
  • 2 large eggs
  • 2 large egg yolks
  • 2/3 cup fresh lemon juice
  • 1 tsp. grated lemon zest

For pie & meringue:

  • 1 pack pre-rolled sweet short crust pastry sheets (or make your own if you so desire, but pre-rolled works well)
  • 3 tablespoons cornflour
  • 220g caster sugar, or to taste (see note below)
  • 4 free-range egg whites

Start by making one quantity of fool-proof lemon curd – see the recipe here(side note, in that post I say I can’t remember how much more difficult traditional lemon curd is to make. Having made a “traditional” batch the first time, I can say it’s not necessarily hard, but my “fool-proof” recipe is much quicker and easier, and in my opinion tastes waaaaay better). You can just put the curd in a bowl in the fridge to cool since you’ll be popping it in the pie soon.

Pre-heat the oven to 190*C.

Line a 23cm loose-bottom fluted tin with the pre-rolled pastry sheets. One should just about do the bulk of it, and then use half a second sheet to fill in the gaps. You may need to use milk or an egg wash to “glue” the bits together, but when I made it in warm weather, the pastry was soft enough that I could just use a fork to press the seams and then smoothed it out/blended it in with my fingers and it worked fine. Trim the edges a little if you like, but if it’s only a small overhang I just leave it then break it off once it’s been baked, for a cleaner line that also allows for shrinkage when baking.

Line your pastry with baking paper and rice (or proper baking beads if you have them) and blind bake for 10-12 minutes, then remove the paper and rice and return to the oven for another 5 minutes, or until golden and well cooked.

Reduce the oven temperature to 150*C.

If you didn’t trim the pastry, break the uneven edges off now, and then fill the shell with your lemon curd. Spread it out evenly with a spatula, then pop it in the fridge while you make the meringue.

In a spotlessly clean bowl, whisk the egg whites for 1 minute, or until thickened. I use the whisk attachment on my cake mix to make this a super easy job, but you can do it by hand if you’re keen!

Add the sugar a little at a time, whisking each addition well, until you have a thick, glossy meringue. I like to add only about three-quarters of the sugar, then taste it and add a little at a time until I’m happy… I’ve not yet made it where I used all the sugar. If you’re tasting it as you go, it helps to taste the lemon curd at the same time… the curd is quite sweet, so I kept the meringue relatively neutral which worked well as it wasn’t too, too sweet. Not being big sweets people, this was just right for Pete and I, but others may prefer everything a bit sweeter.

Blob the meringue over the cooled curd. I just do this with a spatula, which helps to spread it all out to the edges, and then once I have the coverage I use my spatula or a spoon to do little flicks up to make peaks. If you’re fussy or fancy, you could pipe it, but this method works fine for me!

Bake for 30 minutes, or until golden and set. As mentioned in the post above, serve it warm or cold.


4 Comments

That hash brown mincey vege bake thing

We had some friends over to watch the rugby last night, and I said I’d feed them as well. It was a very chilly Waikato day – comfort food was in order! When I first suggested I’d cook, I had  something like slow cooked lamb shanks in mind, but when push came to shove, I really couldn’t be bothered! I wanted something easy, something which could be assembled with minimal fuss, then whacked in the oven and forgotten about. I started thinking about lasagne, but couldn’t be arsed making cheese sauce (anyone sensing I was feeling lazy yesterday?!), so that was out as well. The lasagne idea, though, led me to think of a recipe I have from Mum, for a hash brown mincey vege bake thing.

OK, so it’s actually called Flamenco Pie. Or at least, that’s what it says at the top of the recipe in my book – my book containing hand written recipes of all my favourites from Mum’s repertoire, which I studiously copied out into my book before I left home! I always try to give credit to the original when a recipe has been reproduced on this blog, but in this case I truly don’t know. However, I THINK it may have been from one of the Allyson Gofton Food in a Minute books. In any case, I bastardised the recipe so much last night that it served only as a vague guideline at best, so I think we’ll be okay. Oh yes, but back to the name. No idea what a Flamenco Pie is or where it got that name (“flamenco” is Spanish; this dish isn’t really) but I think “hash brown mincey vege bake thing” sums it up pretty well. If you’re a bit more refined than that, how about “savoury mince and hash brown bake”?

Anyway, on to the recipe.

I reckon that in its simplest form the recipe goes like this: Bake some hash browns in a layer on the bottom. Top with your version of savoury mince. Top with grated veg and cheese. Bake until warmed through. 

Using those basics, you could really make this however you wanted. But for those of you who want a bit more instruction, scroll down to see what I created last night.

The original recipe varies a bit from what I did. For a start, it calls for “1 bottle of Spicy Tomato Sauce”. I’m thinking this was something like a “Wattie’s Bit on the Side” sauce product which no longer exists – that seems to ring a bell from when Mum made it (and would be consistent with the Food in a Minute recipes which often used products like that), but I certainly couldn’t find the equivalent on the supermarket shelf yesterday. The alternative sauce I bought turned out to be a bit sweet, so I ended up adding vinegar and lemon juice to try to counter that. I think it mostly worked, although it was still a little sweet for me… maybe next time I would try it with canned tomatoes instead, and add sweeteners myself if required.

Speaking on lemon juice… wow, what a wonder ingredient! So often, lemon juice has proved to be the missing ingredient and that was certainly true last night. After all my messing around with the recipe, it just wasn’t quite right and didn’t seem properly balanced. In a flash of brilliance I decided to add lemon juice, even though it seemed a bit weird, and hazaa! Just like that, the dish was balanced (or near enough… far better than it was). Never underestimate the power of citrus!

I also doubled the mince, as whenever I’ve made it in the past I’ve felt the meat layer was too thin relative to everything else. I added garlic because… well… garlic is compulsory in everything! I also added extra vegetables to the mince – some which were dying in the bottom of my fridge (hello celery) and others I bought specifically to add to it for variety (hello mushrooms). But what I love about this is that it’s such a great dish for using up vegetables. You could literally chuck in any veges you like to use them up while adding bulk, flavour, and texture to your dish.

Finally, the hash browns. Oh, what a fail! Turns out you’re supposed to cook them first, and so this is the method I’ve described below, even though it’s mot what I did. The original recipe says to place the hash browns in an individual layer in the bottom of the dish, bake for 5-7 minutes until warmed through, and then mash them together with a fork to flatten them and make a thick layer in the bottom. But I didn’t read any of that! So, as I put the hash browns in my dish (thawed but still firm) I decided there were too many gaps between them, so I should moosh the edges together. But because they were raw, that didn’t work, so I broke them up and scattered the bits across the bottom of the dish so there was a complete layer, no gaps. Then I plonked the mince and topping on, and baked it all at once. While it was still nice, the hash brown element wasn’t as good as usual – my husband said it was the best version of this dish I’ve made, except that the hash brown bit wasn’t as good! When you pre-bake them, they crisp up a bit more but also hold their shape better; the way I did it, it was a bit mooshy. While you’d have known there was potato “or something” in it, I don’t think you’d have picked it as hash browns specifically. However, I would say that even when you follow the recipe properly, I think the hash brown layer is a little thin. Next time, I might bake a few extras on a tray and mash them in as well, just to help the ratios.

Anyway, hash brown malfunction aside, this dish turned out pretty awesome. So awesome that I forgot to take a photo of the final product. So awesome that I had it for lunch today. So awesome, in fact, that one of my guests asked me repeatedly for the recipe… so here it is. Enjoy!

Rachel’s version of the hash brown mincey vege bake thing

Serves 6-8 (we got 4 dinner portions and 3 lunch portions, but the dinner portions were quite large)

  • 2 Tbsp oil
  • 1 brown onion, finely chopped (I actually used half a brown onion and a shallot… anything goes)
  • 3 cloves garlic, crushed
  • 1 stalk celery, finely chopped
  • 1 kg mince
  • 1 red capsicum, diced
  • 95g button mushrooms, sliced
  • 1 bottle Delmaine Traditional Tomato Sauce
  • 3 tsp cumin
  • 2 tsp chilli powder (or to taste… I overdid it; 1 1/2 tsp would have been fine. Or leave it out if you don’t like spice)
  • 2 Tbsp balsamic vinegar
  • 1 Tbsp lemon juice
  • 2 carrots, grated
  • 2 courgettes, grated
  • Approx. 1 1/2 cups cheese (I used a mixture of parmesan and colby, because that’s what we had)
  • 6-10 hash browns… enough to cover the bottom of your dish, and maybe a couple of extras for volume (I used seven)

Heat oil in a frying pan, and sweat the onion and garlic until softened.

Add the celery, capsicum and mushrooms, and cook for another couple of minutes before adding the mince.

Use a wooden spoon to break up the mince, and stir it regularly to ensure it browns evenly.

Add the tomato sauce – I started with 1 cup, but ended up adding the rest of the bottle as it wasn’t saucy and rich enough for my liking. If you don’t want to add so much sauce, you can add less, and maybe add some beef stock if it needs more moisture.

Add the spices, then stir to combine everything. Leave to simmer and thicken for 10-15 minutes, stirring occasionally.

Add balsamic vinegar, and season to taste. Stir again, and leave to simmer for another 5-10 minutes… or until you’ve done everything else and are ready for it; it really doesn’t matter.

Put the hash browns in a single layer in the bottom of an ovenproof dish – you may also want to put a few extra on an oven tray. Bake for 5-7 minutes until warmed through, then press with a fork to flatten and mash together into a thick layer – remember to add the extra ones if you did that!

If you haven’t already, grate your carrot, courgette, and cheese.

Just before you’re ready to assemble, taste your mince again and season if required. Stir through the lemon juice, simmer for a minute or two, then remove from the heat.

Pour the mince on top of the hash browns, then top with carrot and courgette, and finally the cheese.

Bake at 180*C for 20-30 minutes, or until cheese is golden and melted, and the dish is piping hot.

Serve with a side salad or more vegetables (broccoli or something would be good) to help cut through the richness.


Leave a comment

Mum’s chocolate chip cookies

I just went to whip up a batch of these and couldn’t find the recipe on my blog. Surely not? How could I have not shared this yet? Well, not sure, but it seems I haven’t so here you go – as much for my quick reference in the future as for your enjoyment!

From conversations over the years, it seems most kiwi kids grew up enjoying some variation of these quick and easy “condensed milk” biscuits. But none would have been as good as MY Mum’s! Of course every kid believes that, but I truly always liked hers the best!

While Mum did a lot of home baking and made many different things, these were definitely one of her most regular treats, and a favourite of mine. They were regularly in my lunch box and in fact contributed to me spitting out my first loose tooth! I clearly remember walking around primary school one morning tea time, eating one of these and thinking there was “just a really hard chocolate chip in the cookie”… so I spat it down the drain at a water fountain before realising it was my tooth! Don’t worry, the tooth fairy still came 🙂

When I make these biscuits, I like to make a big batch, to try and use a bit more of the condensed milk as it doesn’t really use much of the tin which can be annoying. They freeze really well too, so making a lot is not an issue. I also like to bake them directly on the tray rather than putting down baking paper – I find this makes the best caramelised, crunchy bottom.

I have enjoyed these treats for many years already, and hope you enjoy them as much as me for many years to come!

Chocolate Chip Cookies

Makes 36-40 cookies

  • ¾ cup sugar
  • 150g butter
  • 5 Tbsp condensed milk
  • 2 ¼ cups flour
  • 1 ½ tsp baking powder
  • 250g dark chocolate chips

Cream together butter, sugar, and condensed milk.

Stir through dry ingredients and chocolate. The mixture should come together to form a firm dough which holds together. If required, add a little more condensed milk and/or water to achieve the correct consistency.

Roll into small balls – I like to use a tablespoon to measure them out and keep them consistent, although this can be a bit large… maybe use ¾ tablespoon if you don’t want them so large.

Flatten balls with a fork and bake at 180*C for 10-15 minutes. I know most recipes say “cook until golden” but in my opinion, golden is too long for these. Their colour should have “warmed up” but not have changed too dramatically. Fifteen minutes per tray is perfect in my oven (but I always check at 10 minutes, just to be safe).


Leave a comment

Ham, corn & polenta muffins

Last weekend I had a bit of a cook-a-thon to fill the freezer with healthy lunches and snacks. I’ve been really focusing on healthy, low-calorie eating this year but as we all know, failing to plan means planning to fail! Yes, it’s a cliche, but so true – how often do we start the day with best intentions, only to grab something which is a less than ideal choice due to being unorganised and in a hurry.

But even with these good, healthy intentions, we’re still foodies! So, I still want to eat interesting and tasty things, things which don’t taste or look like “health food”, things which will still give me great pleasure to both cook and eat.

A couple of weekends ago, we escaped to the family bach, an isolated farm house where you are completely removed from the hustle and bustle of city life. My main aim that weekend was to use the time out to come up with some good healthy meal plans and snack ideas, so we could be organised and under control when we got back home. I went armed with a whole lot of healthy cook books, but in the end have taken most of my ideas so far from a book called Fitness Food. What I love about the recipes in this book is that the focus is on good quality nutrition. It’s about everything in moderation, including treats, without over-indulging. It’s about cooking from scratch with real food. It’s about sensible eating, not dieting.

One of the recipes which ended up on both my “snacks” and “lunches” list are these ham, corn and polenta muffins. I love all three of the ingredients featured in the title, so that’s a great start! What’s more, they’re quick and easy to make – and economical. One tin of creamed corn will be enough for three batches, and the bag of polenta I bought will also do three batches with some still left over.

I had one at work yesterday and heated it up a little – mostly because it was still frozen, although I do think serving these slightly warm would always be the best way to go. I immediately got oohs and aahs from those around me.

“Ooh, is that home made?” … “Yum, I can smell bacon!” … “Wow, what have you got there?”

Pete’s assessment was that it was really nice and filled with “lots of good stuff”. Translation – it was a good man muffin, hehe!

So yes, fair to say this quick and easy muffin impressed many and totally satisfied me. I ate it at about 10 am as morning tea and still wasn’t really hungry by 2 pm when I had my lunch.

Filling, tasty, nutritious. Tick, tick, tick.

The recipe below is what I did, which worked out at approx. 181 calories per muffin (for a batch of 12). It is largely unchanged from the recipe in the book which stated 174 calories per muffin. For full macros, see the end of this article. I think the only real difference between mine and the recipe is that they used 93% fat-free low-fat cheddar, whereas I used the standard colby cheese we had in the fridge. I also used light blue milk when the recipe said “skim milk” so it should probably have been green but again, I just used what we had.

Enjoy!

IMG_4349

Ham, corn & polenta muffins

Makes 12 muffins, at approx. 181 calories each. Original recipe from Fitness Food.

  • 110g polenta*
  • 1 Tbsp sugar
  • 210g plain all purpose white flour
  • 1 Tbsp baking powder
  • 2 Tbsp canola oil
  • 1 egg, lightly beaten
  • 310 ml light blue milk
  • 125g creamed corn (I bought a tin of Watties cream-style corn, and used exactly 1/3 for this recipe -have frozen the rest into two portions to be used next time)
  • 60g spring onions (approx 4 spring onions. A bit more or less won’t matter)
  • 150g ham, chopped and fat removed
  • 50g colby cheese

IMG_4355

Pre-heat the oven to 200*C.

Sift the polenta, sugar, flour and baking powder into a bowl.

Place the oil, egg and milk in a separate bowl, mix together well, and pour into dry ingredients.

Add the creamed corn, spring onions, ham and cheese, and stir together with a large metal spoon until just combined. Do not over mix.

Spoon the mixture into 12 x 125ml muffin tins and bake for 20 minutes or until risen and golden brown.

Leave in the tin to cool for 5 minutes before turning out into a wire rack to cool fully. Store in an airtight container, or freeze for later.

* I love polenta, but have never bought it before… I’ve always only had it either as an ingredient from Emma’s Food Bag, or or at a reasturant. I don’t think it’s an “out there” ingredient, but I had to go to three different supermarkets before I could get it! So just a word of warning in case you need to “pop out and buy polenta”… it may be harder than you expect!

IMG_4366

Macros as stated in the original recipe are:

Energy 733 kJ (174 cal); Fat 4.8 g; Carbohydrate 24.2g; Protein 7.8g

Macros for my version as per entering the recipe into My Fitness Pal are:

Engery ~757 kJ (181 cal); Fat 7g; Carbohydrate 22g; Protein 7g


2 Comments

Aquafaba… the waste product you never knew you needed

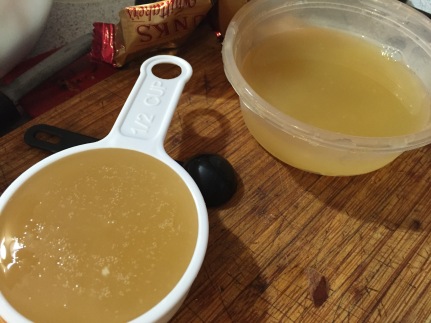
Aqua-whaaat? Yeah I know, it sounds weird. But “aquafaba” is the name for the brine which legumes like chickpeas are cooked in. Yep, that’s right… the stuff you usually drain down the sink when you make hummus or add chickpeas to a casserole.

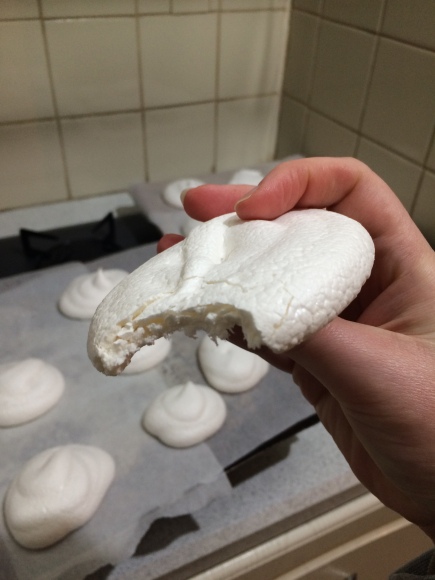
A while ago, I found out you could use chickpea brine to make meringues. It sounded so crazy, I just had to try it! No one I know is actually egg free, and nor do I make a lot of meringues in my life. But, the novelty factor! Besides, it was great to know something which usually goes down the sink could be turned into something useful, good to have an egg-free option, and also good to have a meringue recipe which didn’t require separated eggs which can be a pain at times.

Anyway, I tried it, and they turned out great! Well, maybe just “average”… hard to say. I was making a “batch and a half” and slightly miscalculated the sugar, which didn’t help, but aside from that I thought they just tasted a little bit odd. But, my husband reckons they pretty much tasted how shop-bought meringues tasted, so I guess that’s a good thing.

img_3234

However, from these “odd” tasting meringues, a freaking DELICIOUS gluten free, egg free, dairy free dessert was born… Eton Mess made with chickpea meringues and coconut yoghurt. OMG! Talk about heaven! The bowl was ACTUALLY licked (here’s looking at you, Leah!) and a repeat of the same was put firmly on the menu for another family event last night. I don’t have a photo of the end product unfortunately… the first time I made it, I didn’t get a chance, and then last night’s one was quite sloppy and not that pretty so I decided against it. But, just trust me on this one! Recipe/assembly instructions below.

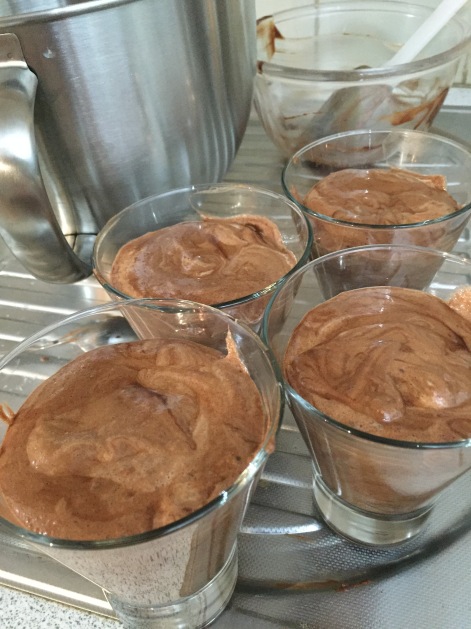
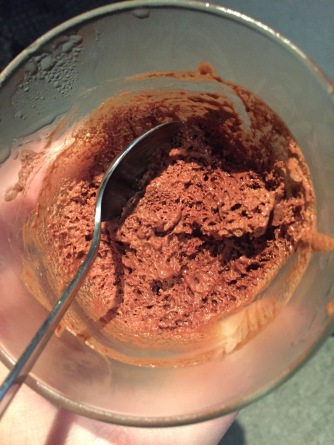
I was all set to blog that recipe when I read another aquafaba recipe on the Love Food, Hate Waste website, which was using it to make chocolate mousse. Intrigued, I HAD to try that before I blogged and it took me a while but I finally tried it this week. Another OMG, delicious moment. It was great! Sooooo light and fluffy! My only complaint was that it was a bit too rich, but that would be easily fixed by reducing the amount of chocolate or serving it with something else; it wasn’t the fault of the chickpea brine. We have also concluded that it is best eaten within a day of making. We ate ours a couple of days later and one of them was quite split at the bottom. The others weren’t split as such, but they were a little sloppy at the bottom. A minor complaint, though.

img_3595

What I love the most about these recipes is the fact it is using up something you were otherwise going to throw out. What’s more, I’m someone who really only makes hummus or dessert when entertaining… so I love that by making one of these (hummus), I have a couple of solid options for the second (dessert) using very simple, cheap ingredients. And honestly, if no one told you these desserts were made with chickpea brine, you would never know.

I get that I may have just blown your mind, but I really urge you to try these recipes out at least once… I’m sure you’ll be impressed and amazed! 🙂

Chickpea meringues

Original recipe and some other ideas for using the meringue here: http://alittleinsanity.com/vegan-meringue-recipe-made-with-chickpea-brine/

  • 6 Tablespoons liquid brine drained from a can of chickpeas (one can worth is slightly more than you need, but not enough for a double batch. You can freeze the extra to use later). Liquid should be at room temp (but mine has usually only been out of the fridge for about 5-10 minutes and worked fine)
  • ½ teaspoon Cream of Tartar (for stability)
  • ¾ cups of sugar – ideally caster sugar, but it doesn’t really matter. I think they’re quite sweet though… would probably only use ½ cup next time and adjust from there.
  • Pinch of Salt
  • ½ to 1 teaspoon vanilla extract
  1. Preheat oven to 120 degrees celsius and line a baking tray with baking paper.
  2. Using a whisk attachment on an electric mixer, add the cream of tartar to the chickpea brine and which on medium-high until it begins to foam (approx. 1 minute).
  3. While whisking, add the sugar 1 Tablespoon at a time until dissolved.
  4. Add the pinch of Salt.
  5. As the mixture becomes thicker, drizzle in the vanilla extract.
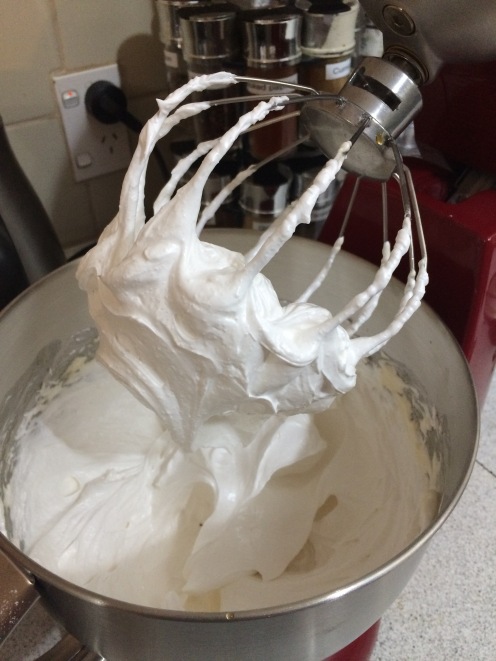
  6. Continue mixing until glossy, stiff peaks form. This can take anywhere from 7-12 minutes depending on your mixer (in my experience, it’s always been on the lower end – use your judgement).img_3197
  7. Prepare a  piping bag with a star tip, or just snip the end off a plastic bag. Fill piping bag with meringue and pipe swirls onto the baking tray – or, if you’re intending to break them up to make Eton Mess, just dollop them on with a spoon.
  8. Bake 40-45 minutes, then shut off oven – but do not open the oven door! Leave cookies in oven for 1 hour to continue drying, then remove them from oven and let cool before storing in an airtight container. TIP – I have cooked mine slightly longer each time… as long as they don’t burn, there’s no such thing as too dry for meringues, so I’d say cook for about 90 minutes and then leave to try for as long as you can.img_3199

Food-allergy friendly Eton Mess

  • 1 batch of chickpea meringues
  • 1 jar coconut yoghurt of your choice – my absolute fave is Raglan Coconut Yoghurt
  • Mixed fresh, frozen (defrosted) or tinned berries of your choice… and a combination of fresh and tinned is probably ideal for good texture. I use 2 to 4 tins, depending on the amount of yoghurt.
  1. Crumble meringues into a bowl. Keep the pieces quite chunky.
  2. Add yoghurt. Use as much as you like so the meringue (and later the berries) are well coated, but it is not too sloppy. Last night I added the whole jar of yoghurt to the bowl before anything else and it was too much, hence my recommendation to do it the other way around.
  3. Drain berries and add to bowl – add as many berries as you think necessary.
  4. Fold together, then serve.

Aquafaba Chocolate Mousse

Original recipe here: https://lovefoodhatewaste.co.nz/recipes/aquafaba-chocolate-mousse/

  • 100g dark chocolate (50% cocoa)
  • 3 teaspoons vanilla essence
  • 1/2 cup + 1 tablespoon aquafaba (approximately the equivalent from one can of chickpeas)
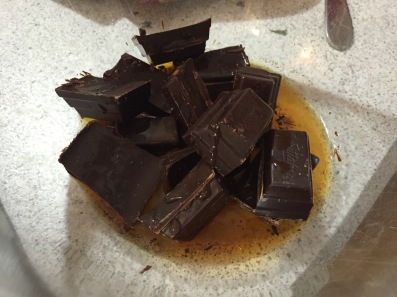
  1. Break the chocolate into pieces and add to a bowl with vanilla essence and 1 tablespoon of the aquafaba.img_3583
  2. Place over a pot with a little bit of water simmering in the bottom. Stir with a metal spoon or dry plastic spatula. As soon as fully melted, remove from heat and allow to cool while you whip the rest of the aquafaba.
  3. Use an electric egg beater to whisk the ½ cup of aquafaba for 5 minutes until it forms stiff peaks and looks like whipped egg white.img_3584
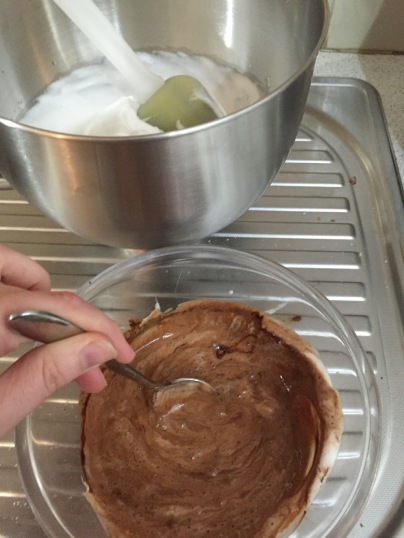
  4. Add quarter of the whipped aquafaba to the melted chocolate and mix through evenly. This lightens the chocolate so it doesn’t flatten the foam as much in the next step.img_3589
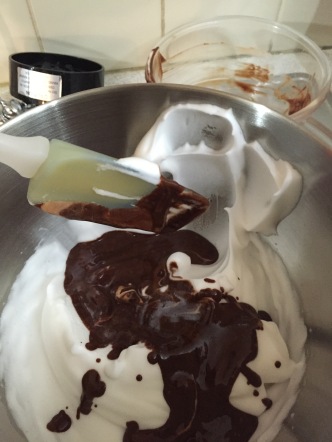
  5. Tip the melted chocolate on to the remaining whipped aquafaba and very gently fold through until it becomes an even colour. The less folding you do the lighter the mousse will be.img_3590
  6. Pour into serving glasses or ramekins and chill in the fridge for a couple of hours before serving.

img_3619


Leave a comment

Marinated feta

I’ve had a block of feta sitting in the fridge for about 6 weeks. Although it was sealed, and so should be fine, I was paranoid that by the time I’d go to use it, it would have gone a bit mouldy. Besides which, I don’t have much need for feta these days, between having meal replacement shakes for lunch and Emma’s Food Bag for dinners, so I wanted a way to preserve this nicely.

I did a bit of a Google for marinated feta recipes. There were good ideas in all of them, but most of all it just became apparent that there weren’t many rules, so I just kind of made it up based on ideas from all of them.

That was two weeks ago. A taste test this weekend confirms it has been successful. The feta has taken on a nice flavour – just subtle hints of all the things I put in with it. But the thing I’m most excited about is the oil – once we’re finished the feta, the flavoured oil we’ll be left with is going to be just divine!

So easy to make, and such a pretty gift. Enjoy!

IMG_3137


  • 1 packet of feta
  • 1 red chilli, deseeded and sliced
  • 2 cloves garlic, finely sliced
  • 4 small sprigs of fresh rosemary
  • 1 Tbsp lemon juice
  • Zest of half a lemon, cut into strips
  • 1 tsp peppercorns
  • Olive oil

Place all ingredients except oil into a jar. You may wish to add the ingredients in a bit of a rotation so they are evenly spaced out and the feta gets even exposure to all of them.

Once happy with the arrangement, fill jar with olive oil until everything is covered.

Seal with a lid and store in the fridge. Leave to marinade for at least one week before serving.

Serve at room temperature (the oil will solidify and go white in the fridge, but leaving it out at room temperature for an hour or two before serving will see it return to its normal state).


Leave a comment

My first taste of persimmon

On Sunday, I got to experience something quite unique for an adult – discovering and tasting something new with all the wonder of a child learning about the world!

IMG_3132

Over Queen’s birthday weekend, we had friends feeding our cat while we were away, and came home to find they’d left us fruit. I say “fruit” because it was lemons and … something! I had no idea what the orange things were, and my husband had to inform me they were persimmons.

I had never had a persimmon, clearly! I had no idea what to with them. And I must confess, I am not very adventurous when it comes to fruit. I will give almost any meat or vegetables a go, but I am much more reserved with my fruit tastings.

At first I was just going to take them to work, but Pete convinced me I should at least try them and suggested I make sauce or chutney or something. Realising I was being a sook and copping out by giving them away, I came around to his way of thinking and found this spicy persimmon chutney recipe online!

Cue the childlike wonderment. I started to peel them and was quite surprised how firm the flesh was under the peeler… I had expected it to be soft. Then I had to cut into it. Again, I expected it to be soft – I was expecting juice and seeds to spill out like a tomato. Imagine my surprise in finding they are firm all the way through with a cute little star in the middle! I chopped them all up before I was brave enough to taste some. Hesitantly, I put a small piece in my mouth and… yum! It was like a rockmelon and an apple had a baby 🙂

IMG_3134

At this point, I was getting very excited. I had a feeling this chutney was going to be awesome, and I was right!

Curiously, the persimmons don’t break down as much as I expected. They certainly softened while cooking, but really held their shape and took on a bit of a peach like consistency. The apple, on the other hand, totally broke down which made for a gorgeous, thick sauce as the base of the chutney. Now that I know the persimmon won’t break down much, I would cut it a bit smaller next time, but that is all I would change.

Complimenting the beautiful fruit textures was the perfect balance of heat and tang – there was just the right amount of spice and vinegar to offset the sweetness. I would say this is one of the most balanced chutneys I’ve tasted.

And it’s not just me – this chutney has gone down a treat! I served it to some ladies at my World Organics launch party on Monday night, and it was well received… I recall one lady saying “I’m getting addicted to your chutney”! The next day I took the leftover snacks into my work team and got rave reviews again. “I can’t stop eating this, it’s just so good” was one comment, and another was “I usually buy Mrs Ball’s because that’s the best chutney but I think this one might be better; you’ve inspired me to make some.” It actually started to get embarrassing how many times I was thanked and complimented! But – definitely confirmation I’m on to a winner.

Enjoy!

IMG_3141

Spicy Persimmon Chutney

View the original recipe here

Makes about 8 cup / 5-7 jars

  • 1 cup apple cider vinegar
  • 2 onions, chopped
  • 2 Granny Smith apples, peeled, cored and chopped
  • 1 1/2 cups white sugar
  • 1/2 cup lemon juice
  • 2 red chillis, seeded and sliced
  • 2 tablespoons minced fresh ginger root
  • 2 tablespoons lemon zest
  • 2 teaspoons ground coriander seed
  • 1/4 teaspoon ground cloves
  • 8 persimmons, peeled and chopped

In a large saucepan combine the apple cider vinegar, chopped onion, chopped apple, sugar, lemon juice, chilli, ginger, lemon zest, coriander and cloves.

IMG_3131

Bring to a boil over medium heat, stirring occasionally. Reduce heat to medium-low and simmer until mixture thickens, stirring frequently, about 25 minutes.

Add the persimmons and simmer until the persimmons are tender – about 5 to 10 minutes.

IMG_3138

Remove from the heat and pour into sterilised jars.


Leave a comment

Chicken dumplings and udon noodle soup with Thai basil and bok choy

On a wet, wintery night, there’s nothing better than a hot and tasty Asian style noodle soup, and I’d been looking forward to this one from Emma’s Food Bag all week! It certainly didn’t disappoint. As I was making it, I was concerned it would be a little one dimensional and not tasty enough, but by the time the final dish came together, it was just perfect.

We are lovers of chilli, so I was keen to bump up the chilli content! I’ve left the recipe below as it was intended to be made, but note that we put the other half of the red chilli into the soup at the same time as the noodles. I decided not to put the other half of the green chilli into the dumplings or soup in case it was too much, but in hindsight it would have been fine to use this up as well.

I was a little worried the chicken would be overcooked, as it took me longer than the recipe stated to soften my bok choy (I thought it was because my pot wasn’t quite big enough, but just realised as I re-typed the recipe that I didn’t slice it as I was supposed to but rather chucked the leaves in whole… oops!). However, the meatballs/dumplings weren’t at all tough or overcooked – they were still moist and delicious all the way through. It is quite a wet mixture when you’re making them, which does make them a little tricky to handle, but this pays off at the other end when the meatballs are still juicy.

Enjoy!

Udon noodle soup (9)

For the meatballs/dumplings:

  • 225g chicken mince
  • 1 clove garlic, crushed
  • 1 thumb ginger, grated
  • 1/2 green chilli, deseeded and diced
  • 1 Tbsp fish sauce
  • 1/4 cup breadcrumbs (I used panko, as that was all I had, and it worked well)
  • 1 egg, beaten

For the soup:

  • 2 pouches udon noodles
  • 3 cups water
  • 1 chicken stock cube
  • 2 Tbsp fish sauce
  • 1 thumb ginger, sliced
  • 2 heads bok choy, trimmed and roughly sliced
  • 1 small carrot, scrubbed and sliced
  • 15g Thai basil, roughly chopped
  • 1/2 red chilli, sliced (deseed it if you don’t like things too hot)
  • 2 Tbsp sesame seeds

Make the dumplings first. Peel and grate the ginger and place it in a large bowl along with the crushed garlic, chopped chilli, chicken mince, breadcrumbs, egg and fish sauce.

Mix well using your hands, then roll into large balls (approx. 1 Tbsp each) and refrigerate for 10-15 minutes.

Udon noodle soup (2)

While the meatballs are setting in the fridge, prepare the rest of the meal. Slice the remaining ginger (no need to peel), scrub and slice the carrot, and trim the root off the bok choy. Slice the bok choy roughly and rinse under the tap.

Bring the water to the boil in a large saucepan and crumble in the stock cube. Add the sliced ginger to the stock pot. Reduce the heat and allow the flavours to gently infuse for 5 minutes.

Add the carrots to the pot along with the meatballs and fish sauce. Cook for a further 6-8 minutes until the meatballs start to firm up.

Udon noodle soup (3)

Add the bok choy to the pot along with the noodles. Simmer gently for 1-2 minutes to warm the noodles and wilt the bok choy. Once the green leaves of the bok choy start to wilt, remove soup from the heat and serve immediately.

To serve the soup, ladle into bowls and top with a sprinkle of Thai basil, sesame seeds, and sliced red chilli. You can either remove the ginger before serving or eat it if you like the taste.

Udon noodle soup (5)


Design a site like this with WordPress.com
Get started